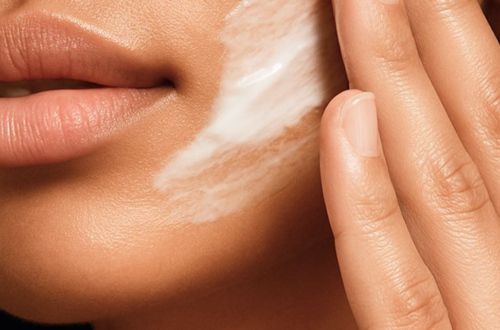
If you ever looked in the mirror and wondered why your skin feels dull even though you use all the right products, you are not alone. Oil cleansing gives you that soft, radiant finish that regular cleansers rarely deliver. Once you figure out how to do it properly, everything changes. Your pores look clearer, your makeup melts off like butter, and your skin feels nourished instead of stripped. Sounds tempting right?
I first tried oil cleansing out of curiosity because everyone swore it worked like magic. I expected something complicated, but the routine turned out to be simple and surprisingly satisfying. If you want to nail this method and actually see results, this guide walks you through everything step by step.
What Exactly Is Oil Cleansing
Oil cleansing uses oils to break down makeup, sunscreen, dirt, and excess sebum. Your skin produces oil naturally, so cleansing with the right oils works beautifully because similar substances dissolve each other.
Ever wondered why your waterproof mascara refuses to budge? Oil comes to the rescue because it breaks down the clingiest makeup in seconds.
You massage the oil into your skin, let it melt everything, and then remove it with water or a warm cloth. You finish with a gentle cleanser. You get a deep clean without stripping your natural moisture barrier. It feels luxurious and practical at the same time.
Why Oil Cleansing Works So Well
Oil cleansing works because it respects your skin’s natural chemistry. Your skin hates harsh foaming cleansers that leave it tight. Your skin responds beautifully to oils that support balance.
Here is why this method gives real results.
It dissolves buildup easily
Oil attracts oil. This means it pulls out excess sebum, old sunscreen, and dirt tucked into your pores.
It softens the skin
Oils nourish your skin while cleansing it. You feel smoother after the first try.
It supports balanced skin
Your skin stops overproducing oil when you use nourishing oils. Ever noticed your skin looks calmer when it gets what it needs?
It boosts glow
You massage your skin thoroughly during oil cleansing. This improves circulation and gives you a natural glow.
IMO, oil cleansing remains one of the few methods that give fast and long lasting results without doing too much.

Signs Oil Cleansing Might Benefit You
You might want to add oil cleansing to your routine if:
• Your skin looks dull
• Your pores clog easily
• Your makeup stays on like cement
• You wear sunscreen every day
• Your skin feels tight after washing
• You want a natural method that gives visible glow
If these sound familiar, this routine will help you instantly.
Best Oils For Oil Cleansing
Choosing the right oil matters a lot. Not every oil suits every skin type. You want something lightweight and non comedogenic.
Here are the top options that work beautifully.
For Oily and Acne Prone Skin
• Grapeseed oil
• Hemp seed oil
• Sunflower oil
These oils stay light and do not clog pores. Hemp seed oil remains a favorite because it balances oil production.
For Dry Skin
• Olive oil
• Sweet almond oil
• Avocado oil
These oils nourish and soften your skin deeply.
For Combination Skin
• Jojoba oil
• Squalane oil
Both mimic your skin’s natural oils and feel soothing.
For Sensitive Skin
• Apricot kernel oil
• Calendula infused oil
These options calm irritation and cleanse gently.
FYI, avoid coconut oil for your face unless your skin tolerates it well. It clogs pores easily.
How To Oil Cleanse For Effective Results
This part matters the most. A lot of people oil cleanse incorrectly and then wonder why they break out. Here is the correct method.
Step One Apply Your Oil To Dry Skin
You want to start with dry hands and a dry face. Pump or scoop your oil into your palms and warm it slightly. This helps your skin absorb it better.
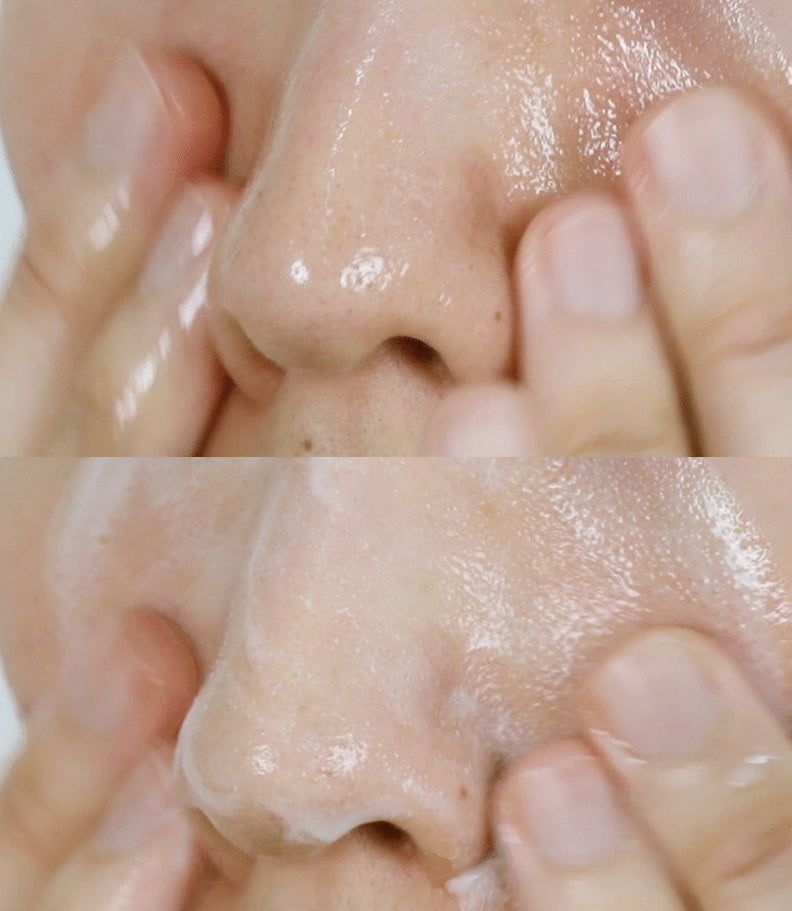
Massage the oil onto your skin in slow circular motions. Take your time. Oil cleansing works best when you massage long enough to break down everything.
Step Two Massage For One To Three Minutes
This step transforms the experience. You want the oil to dissolve makeup, sunscreen, and dirt. Massage your cheeks, jawline, forehead, and nose thoroughly.
Ever rubbed your nose and felt tiny gritty pieces? That happens when your pores release buildup. It feels oddly satisfying.
If your skin ever feels clogged, this step will save you.
Step Three Add A Little Water To Emulsify The Oil
Depending on the oil you use, this step varies slightly. If you use an emulsifying oil or cleansing oil, it turns milky when you add water. This helps wash everything off easily.
If your oil does not emulsify, no problem. You use a warm cloth in the next step.
Step Four Remove The Oil With A Warm Cloth
Use a soft microfiber or cotton cloth. Wet it with warm water and press it gently onto your face. This opens your pores and helps lift off oil.
Wipe your face in gentle motions. Repeat until no oil remains.
Your skin should feel clean but still comfortable. If you feel any residue, repeat the wipe.
Step Five Follow With A Gentle Cleanser
Oil cleansing counts as your first cleanse. You need a water based cleanser to finish the job. Use something gentle that does not strip your skin.
This ensures your skin stays balanced while remaining thoroughly clean.
What To Expect When You Oil Cleanse Regularly
Your skin changes noticeably after a few days of consistent oil cleansing. Most people see:
• Softer skin
• Fewer clogged pores
• Better makeup removal
• A natural glow
• More balanced oil production
Your skin finally gets the deep cleanse it needed without harsh products.
I always notice my face looks less congested after three days of oil cleansing. My skin feels smoother too.
Common Oil Cleansing Mistakes
Oil cleansing works beautifully, but many people make mistakes. Avoid these if you want good results.
Using the wrong oil
Not every oil suits your skin. Pick lightweight oils if you are acne prone.
Not removing the oil properly
If you leave oil on your skin, you might break out. Always remove it with a warm cloth.
Rushing the massage
Your skin needs time to release buildup. Slow down for better results.
Using too much oil
A little goes a long way. Start small and add more if needed.
Skipping your second cleanse
Your skin needs both steps for balance.
How Often Should You Oil Cleanse
Most people oil cleanse every night. If your skin feels sensitive, try it three to four times a week.
You adjust according to how your skin reacts. Pay attention to changes.
If your skin feels clogged, increase the frequency. If it feels irritated, reduce it.
Can Oily Skin Use Oil Cleansing
Yes. Oily skin benefits the most from this method. The right oils balance your natural sebum production. You might feel nervous at first, but your skin adjusts well.
Oil cleansing helps your pores stay clear and reduces excess shine over time.
Can Dry Skin Use Oil Cleansing
Absolutely. Dry skin enjoys this method because it adds moisture while cleansing. Just choose nourishing oils and use a gentle cleanser afterward.
Your skin will feel soft and healthy.
Oil Cleansing And Acne
Oil cleansing can help acne prone skin, but you need the right technique. Use non comedogenic oils and remove everything thoroughly.
If your acne worsens, switch to regular cleansers. Your skin tells you what it needs.
Best Cleansing Oils To Try
If you prefer using pre made cleansing oils that emulsify easily, here are some great options.
• Hada Labo Gokujyun Cleansing Oil
• Kose Softymo Speedy Cleansing Oil
• Beauty of Joseon Radiance Cleansing Balm
• DHC Deep Cleansing Oil
These options remove makeup quickly and feel gentle.
Best Pure Oils For Manual Oil Cleansing
If you want something natural, these oils never disappoint.
• Jojoba oil
• Grapeseed oil
• Sunflower oil
• Sweet almond oil
• Olive oil
Your skin type determines your best match.
How To Know If Oil Cleansing Works For You
Your skin gives clear signals when this method suits you. Look for:
• Fewer breakouts
• Smoother texture
• Faster makeup removal
• A healthy glow
• More balanced oil production
If your skin reacts poorly, adjust your oil, change your technique or stick to cleansers.
Extra Tips For Better Results
These small tweaks make a big difference.
Warm your hands before massaging
This helps the oil spread easily.
Spend extra time on your nose and chin
These areas clog easily.
Use a clean cloth every time
You avoid transferring bacteria.
Avoid rubbing your eyes too harshly
Your eye area stays delicate.
Follow with a hydrating toner
Your skin absorbs moisture better after cleansing.
Final Thoughts
Oil cleansing gives you clean, soft, glowing skin when you do it correctly. The routine feels relaxing and effective at the same time. You break down sunscreen, remove stubborn makeup, and nourish your skin in a few simple steps.
If you ever wanted a skincare method that feels luxurious and practical, oil cleansing checks every box. Try it consistently and watch how your skin responds. You might fall in love with the results and wonder why you waited so long. 🙂