Here’s something most people don’t realize: aloe vera isn’t just a gel you smear on sunburns and call it a day. It can actually be transformed into a rich, buttery moisturizer that works on your face, body, and even hair. Imagine a single product that hydrates, soothes, and nourishes without feeling greasy or heavy. That’s the magic of aloe vera butter.
Making it yourself is also satisfying to know exactly what’s going on your skin. Plus, it’s way more versatile than store-bought creams, which often overcomplicate things with unnecessary additives. Let’s break down how to make a multi-purpose aloe vera butter and why each step and ingredient matters.

Why Aloe Vera Butter?
Aloe vera is packed with vitamins, antioxidants, and polysaccharides that soothe and hydrate skin. But the gel alone can feel watery and evaporate quickly. Turning it into a butter changes the game:
- Locks in moisture with natural oils and butters
- Calms irritation, redness, and peeling
- Provides a silky, smooth texture for easy application
- Works as a hair sealant, body cream, or face moisturizer
By combining aloe vera with carrier oils and solid butters, you get a product that glides, nourishes, and absorbs beautifully.
Ingredients You’ll Need
Every ingredient has a purpose. Here’s what you need and why:
- Fresh Aloe Vera Gel (1/2 cup) – The star of the show. Provides hydration, soothes inflammation, and improves barrier health.
- Shea Butter (1/4 cup) – A rich occlusive that locks in moisture and softens dry patches.
- Cocoa Butter (2 tbsp) – Adds firmness and structure to the butter, plus antioxidants for skin health.
- Coconut Oil (2 tbsp) – Lightweight emollient that smooths skin and hair.
- Jojoba Oil (1 tbsp) – Mimics natural sebum, perfect for balancing moisture without clogging pores.
- Vitamin E Oil (5–6 drops) – Preserves the butter and adds skin repair benefits.
- Optional Essential Oils (5 drops) – Lavender, chamomile, or rose for calming scent and extra soothing properties.
Everything here is functional, no fluff. Each ingredient contributes either hydration, barrier repair, texture, or scent.
Tools You’ll Need
- Double boiler or heat-safe bowl + saucepan
- Hand mixer or stand mixer
- Glass jar or airtight container
- Spoon and whisk
- Measuring cups/spoons
The tools help create a smooth, whipped consistency and prevent overheating the delicate aloe gel.
Step 1: Prepare the Aloe Vera Gel
Fresh aloe works best. Slice a leaf, scoop out the gel, and blend it until smooth.
Why blending matters:
- Removes stringy fibers that can irritate skin
- Ensures even distribution in your butter
- Helps create a creamy final texture
If you’re using store-bought gel, make sure it’s pure aloe without alcohol or additives that can dry your skin.
Step 2: Melt the Butters
Use a double boiler to gently melt shea and cocoa butter until soft but not completely liquid. Avoid overheating, high heat destroys nutrients.
Pro Tip:
Keep it under medium heat. You want it soft enough to mix, not scorch your butters.
Step 3: Add Oils
Once the butters are soft, stir in coconut and jojoba oils. Mix thoroughly.
This step:
- Improves spreadability
- Boosts hydration
- Balances the texture between firm butter and watery aloe
Add vitamin E oil here too, as it is sensitive to heat and can degrade if added too early.
Step 4: Incorporate Aloe Gel
Remove the mixture from heat and let it cool slightly. Slowly fold in blended aloe vera gel.
- Blend using a hand mixer on low speed.
- Aim for a creamy, whipped consistency.
- Avoid pouring hot butter directly into aloe, it can cook it, ruining the texture and nutrients.
This is the point where aloe transforms into a butter, giving it a lightweight but nourishing feel.
Step 5: Whip for Fluffiness
Whip for 3–5 minutes using a hand mixer.
Whipping:
- Introduces air for a soft, luxurious texture
- Makes application smooth on both skin and hair
- Creates a buttery, non-greasy finish
Don’t rush it. A little patience here makes a big difference.
Step 6: Add Optional Essential Oils
If you want a scent or extra soothing properties:
- Add 5 drops of lavender, chamomile, or rose
- Mix lightly to avoid over-whipping
This step personalizes your butter without overpowering it. A subtle aroma adds a spa-like experience.
Step 7: Store Properly
Transfer into a glass jar with a tight lid. Keep in a cool, dry place.
- Lasts 3–4 weeks at room temperature
- Can be refrigerated to extend shelf life
- Always use a clean spatula to scoop
Avoid water contamination, it shortens shelf life and can cause spoilage.
The Big Benefits of Multi-Purpose Aloe Vera Butter
You might be thinking, “Okay, it’s buttery and smells nice, but why bother making it myself?” Let’s talk benefits that go beyond just soft skin. This butter is a multitasking powerhouse.
1. Helps With Stretch Marks
Stretch marks appear when skin stretches faster than it can handle, causing tiny tears in the dermis. Aloe vera butter, rich in hydrating oils and barrier-supporting butters, helps keep skin supple. While it won’t erase old stretch marks completely, consistent application improves elasticity and reduces the appearance of new ones.
2. Supports Hair Growth and Scalp Health
Yes, you can actually use it on your scalp! Aloe nourishes hair follicles, while oils like jojoba and coconut improve hydration and reduce dryness. Applying the butter to your scalp or the ends of your hair helps strengthen strands, prevent breakage, and promote a healthier, glossier look.
3. Heals and Protects the Skin Barrier
A compromised barrier leads to dryness, irritation, and sensitivity. The combination of ceramide-like properties from shea butter, squalane mimicry from jojoba, and aloe’s polysaccharides works synergistically to rebuild and protect your skin’s natural barrier. This means your skin retains moisture better, feels resilient, and recovers faster from environmental stress.
4. Soothes Irritation and Redness
Aloe vera’s natural anti-inflammatory compounds calm redness, itching, and mild irritation. Whether it’s sunburn, minor eczema, or post-exfoliation sensitivity, this butter provides a cooling, calming effect that store-bought lotions rarely replicate without harsh additives.
5. A Natural Alternative to Store-Bought Products
Most commercial creams contain synthetic ingredients, fragrances, and preservatives that sometimes irritate skin. This DIY butter is completely customizable, clean, and nutrient-dense, giving your skin a nourishing experience without unnecessary chemicals. You control every component, ensuring it suits your needs perfectly.
6. Multipurpose Use Saves Time and Money
One jar can be your face moisturizer, body butter, hand cream, and hair treatment. No need for ten different products cluttering your shelf. It’s efficient, effective, and cost-friendly—a single butter doing the work of an entire bathroom cabinet.
How to Use Multi-Purpose Aloe Vera Butter
For Skin
- Apply after showering to lock in moisture
- Use on dry patches, elbows, knees, or hands
- Layer lightly under body oils if needed for extra hydration
For Hair
- Apply sparingly to ends as a leave-in moisturizer
- Smooth frizz or dry patches on scalp
- Works as a pre-shampoo treatment for deep hydration
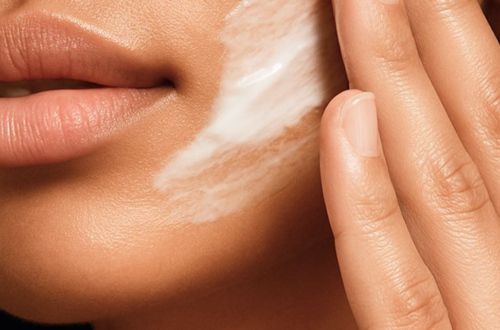
For Face
- Use as a night cream if your skin tolerates heavier textures
- Focus on dry areas, not oily zones
- Blend with a lighter oil if you want a thinner consistency
The butter is truly versatile. One jar, multiple applications—practical and elegant.
Why Homemade Beats Store-Bought
- Customizable ingredients – You decide the oils, scents, and consistency
- No unnecessary preservatives – Only what your skin needs
- Fresh nutrients – Aloe, vitamins, and butters retain potency
- Cost-effective – One batch serves face, body, and hair
Many store options are overly complicated, with fillers, silicones, or perfumes that irritate sensitive skin. Making your own avoids that absurd overcomplication.
Tips for Best Results
- Use fresh aloe – Nutrients degrade quickly after extraction
- Avoid high heat – Overheating destroys vitamins and active compounds
- Whip for texture – Air incorporation makes butter soft and luxurious
- Layer wisely – Apply on damp skin for best absorption
- Patch test essential oils – Even natural oils can irritate sensitive skin
These small details make a noticeable difference in texture, efficacy, and comfort.
Common Mistakes to Avoid
- Pouring hot butter directly into aloe – creates clumps and can irritate skin
- Overdoing essential oils – scent is nice, but too much irritates
- Storing in warm humid areas – encourages spoilage
- Using dirty spatulas – introduces bacteria
Avoiding these ensures a smooth, long-lasting aloe butter.
Why This Butter Is a Game-Changer
Multi-purpose aloe butter combines hydration, barrier repair, soothing, and versatility in a single product.
It’s especially useful for:
- Dry, sensitive skin – Calms irritation and flakiness
- Post sun exposure – Reduces redness and tightness
- Hair ends – Hydrates without weighing down
- Hands and feet – Smooths rough patches efficiently
It’s a simple but luxurious solution for everyday care.
Final Thoughts
Making your own aloe vera butter is not complicated. It’s just about respecting the ingredients, following the steps, and storing it correctly.
Once you try it, you’ll notice: hydrated skin, calmer irritation, and a buttery finish that feels like a spa treatment at home. One jar, endless uses.
So go ahead, grab some aloe, butter, and oils, and whip up something that truly nourishes from head to toe.